

How To Connect Camera To Website
December 21, 2015.
Let's say you lot know very fiddling about IP security cameras and you just purchased 1. You have it in your hands, and you are wondering how to view the darn matter. If you've purchased one of CCTV Camera Earth's IP cameras then it'south piece of cake to view your photographic camera on your estimator. The guide below is for Windows computer users, however the process is very similar for Mac computer users besides. The same process outlined in this article should be applied when trying to view your NVR or DVR from your computer using a web browser.
Step 1: Connect the camera to your network
Get-go, connect the camera to your network. There are three means to connect a PoE based IP camera to a network:
ane) Connect using a PoE switch - this is by far the easiest method. You need one cable betwixt the photographic camera and one of the PoE labeled ports on the switch. This method sends both ability and data over the same cable.
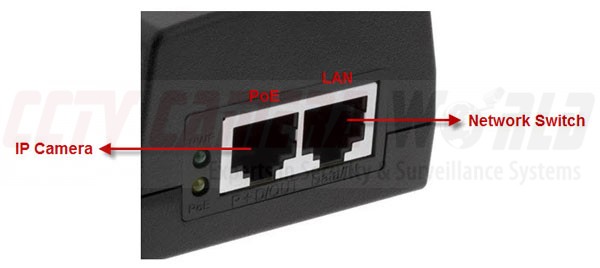
ii) Connect using a PoE injector - retrieve of this as a hybrid method of #1. If you just have 1 IP camera, nosotros recommend using a PoE injector which is like an intermediary span between your network and the camera. You run a network cable from a regular not-PoE switch or router to the LAN input (aka Information IN) on the PoE injector, and some other cable from the PoE port (aka Data & Power Out) of the injector to the network jack on the camera. The PoE injector needs to be powered and comes with a power cable that requires a 110-220V Air conditioning outlet.
iii) Connect using a power adaptor and non-PoE switch - if you lot have the power to provide power to the photographic camera using a power adaptor connected to a nearby electrical outlet, then you can power the camera separately using your 12V DC power adaptor and send data over a network cable to a regular non-PoE network switch or router.
Step 2: Make up one's mind the camera's IP accost
IP security cameras are called network cameras because they utilize a network to send video/audio/data. When continued to a network, they require an IP address to communicate to other devices on the network, which is the same method in which your calculator works on a network. IP cameras have tiny computers inside!
To view the photographic camera, you lot are using your figurer, tablet or smartphone to talk to it. To exercise this task you need to decide what is the IP address of the camera afterwards you lot have connected it to your network in Footstep 1.
Although all of our IP cameras, DVRs and NVRs have a default IP accost of 192.168.1.108 when they send from the factory, this may be modified automatically on your network since they have a setting called DHCP activated. DHCP is a function on the camera that allows information technology to inquire your router for another IP accost if 192.168.1.108 will non work on your network; this will happen when y'all accept another device with the same IP address or your IP address scheme is dissimilar (eg. x.1.10.1). And so depending on how your network is setup, the camera may or may not retain the default IP address of 192.168.ane.108.
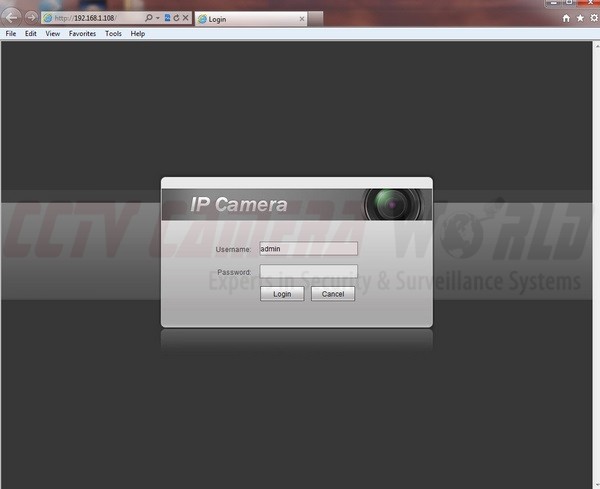
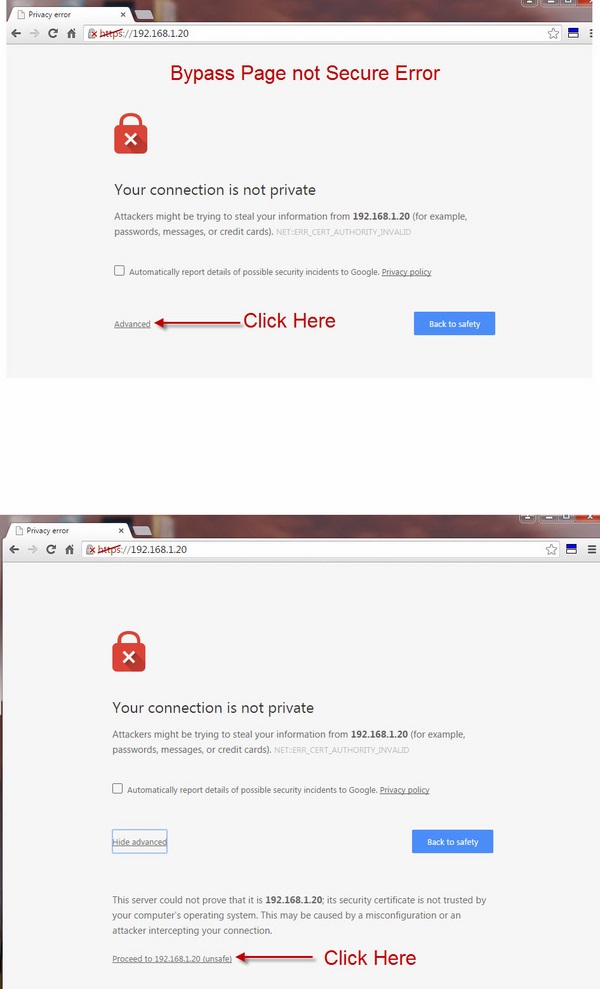
If you lot blazon 192.168.1.108 in to your spider web browser and you don't see a spider web login page similar the one above for the camera, make certain you are not getting a security folio fault. Check if the page looks similar the one below shown in our Chrome browser, and click on the links nosotros illustrate to bypass the error folio:
If you are withal unable to to meet the login page, proceed to Step3, otherwise you are all done. Just enter the default user credentials to view your camera. The default username is admin and the password is admin.
Pace three: Use Config Tool to find the camera and modify your camera'south ip accost
With your camera or DVR buy comes a software CD, which will incorporate the Config Tool that allows y'all to find any IP camera, network video recorder, or digital video recorder that you have purchased from usa. In this guide the following important facts are causeless:
- Y'all accept properly connected the device to your network using a known good network cable
- You lot have powered on the device
- You are on the same network as the device
A) Observe the programme file for Config Tool on your CD or download it from our programs section. If you lot are downloading it, be sure to extract the file and locate the setup file which should wait like the following:

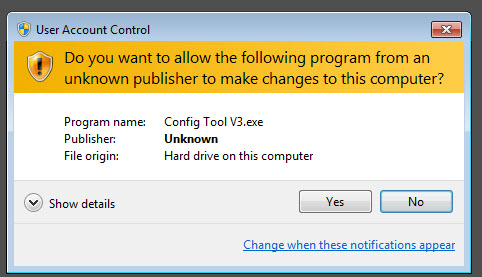
B) Double click to run the setup file and y'all may get prompted by a security alert similar the one below. Click Yes to go on.
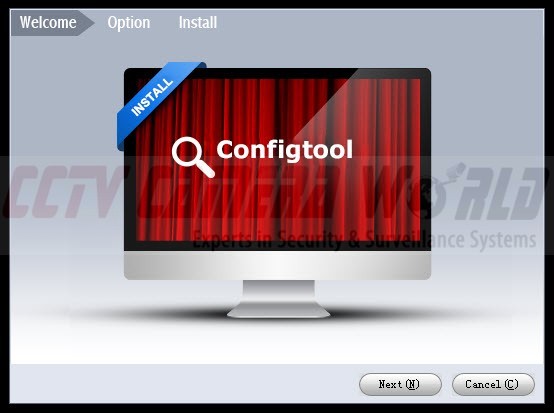
C) You will exist presented with a welcome screen for the Config Tool plan installer. Click adjacent to proceed.
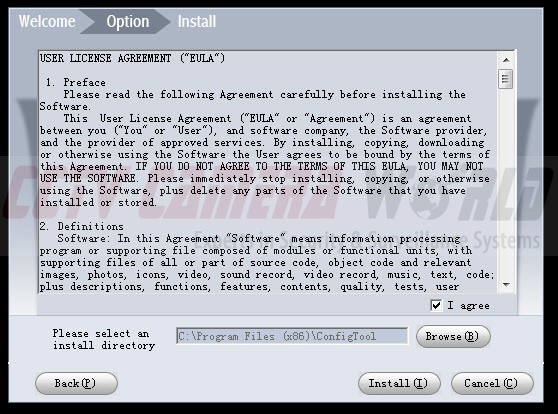
D) Click on the "I agree" box to concur to the software license agreement, and click Install.
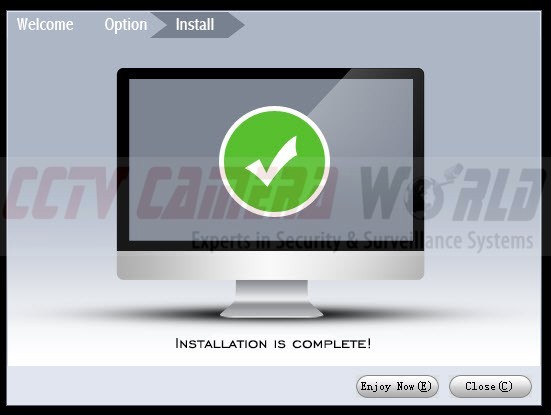
E) In a brusque while the program volition install and you should encounter the following screen upon completion of the installation process. Click Shut when done.
F) Locate the program icon on your Windows Desktop which should look like the post-obit; double click on the plan icon.
![]() Double click on the Config Tool icon to launch the programme.
Double click on the Config Tool icon to launch the programme.
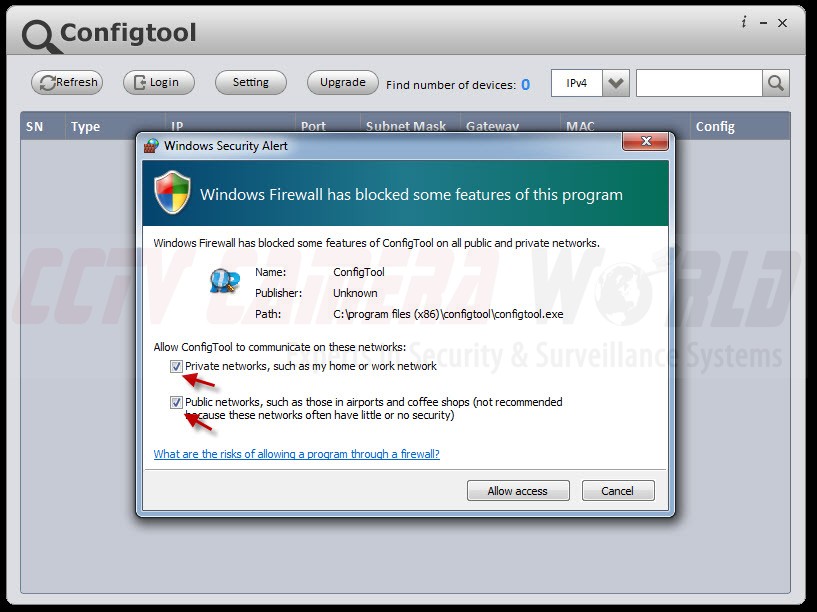
G) Depending on your Windows Firewall settings, you will prompted with a permissions window. As illustrated in the following picture, be sure to Click on both checkboxes to allow permissions for both public and individual networks.
H) Once the plan runs, information technology will automatically start scanning your network to find ip cameras, NVRs, and DVRs that you lot may have from CCTV Photographic camera World. If you don't see whatsoever listings, or if you see merely one list for PC-NVR (equally shown below) with an IP address of 0.0.0.0, click on Refresh.
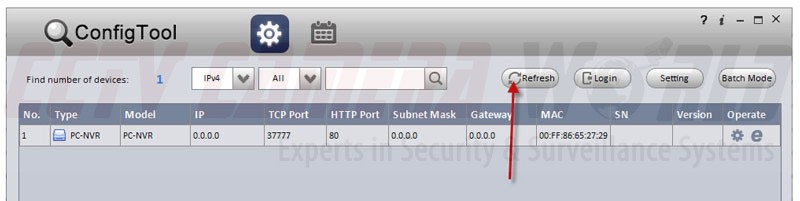
If yous don't run into more listings appear so y'all will take to practice a piddling more to instruct the plan to scan your network, otherwise Skip to step 3 Fifty.
I) Open the command prompt. Click on the Start button, type cmd, and press enter. A command prompt similar the following will announced.
Blazon ipconfig in the windows control prompt and printing Enter.

J) Locate your computer IP address and router IP accost in the output from the ipconfig command.

The ip address of the computer y'all are using will be listed nether IPv4 Accost, and the Router IP will be listed as the Default Gateway. In our scenario, the router address is 192.168.1.1. And so we want to find all the devices on this network starting from the Router IP.
K) Change scanning settings past starting time clicking the Settings button.
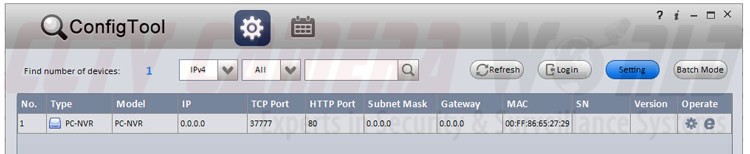
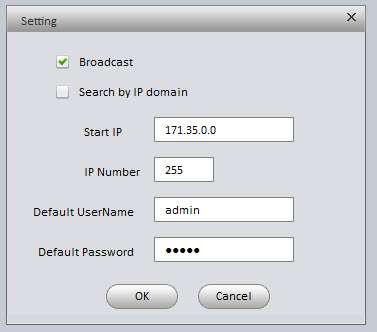
Change the default settings that are displayed above, equally follows;
- Uncheck Circulate
- Bank check Search by IP domain
- Enter your router IP in Start IP
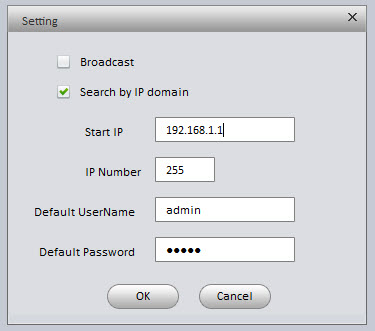
Click OK to save settings and upon completion the Config Tool window will start refreshing and will listing all devices it finds on your network that are CCTV Photographic camera Globe ip security equipment.
L) The plan will find your IP security camera or NVR and list each device'due south ip address. In our example below you can come across one IP camera was found with address of 192.168.1.125.

This lists other of import information as well, permit'south review what each cavalcade means:
Step 4: Access the IP camera using your web browser
If your camera Subnet and Gateway friction match your computer Subnet and Gateway, click on the ![]() icon in the device list, and a browser should launch showing you the login screen. In our case nosotros are using Google Chrome as the default browser.
icon in the device list, and a browser should launch showing you the login screen. In our case nosotros are using Google Chrome as the default browser.
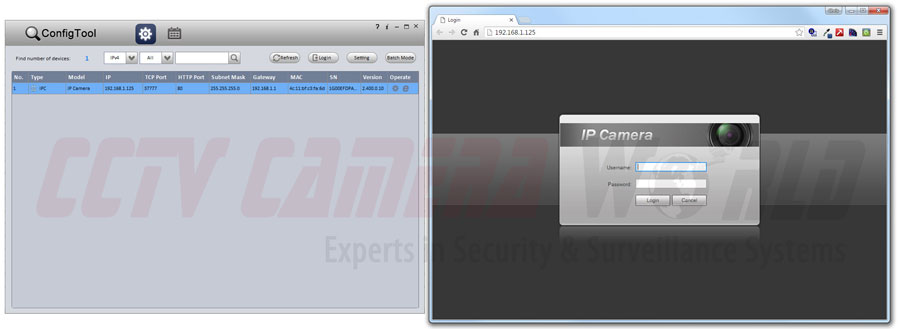
If y'all see the above page, then you are all set. Only enter the default user credentials to view your photographic camera. The default username is admin and the password is admin.
If you don't see the login page or yous would like to change the IP address of your photographic camera, NVR, or DVR, so continue to Pace 5.
Step 5: How to change your camera or DVR IP address
If y'all were unable to access the web page for your IP photographic camera or DVR because the IP address of the device is incorrect, this section will show y'all how to rapidly change the ip address under network settings using the Config Tool.
a) Click on the ![]() gear icon to modify configuration settings
gear icon to modify configuration settings
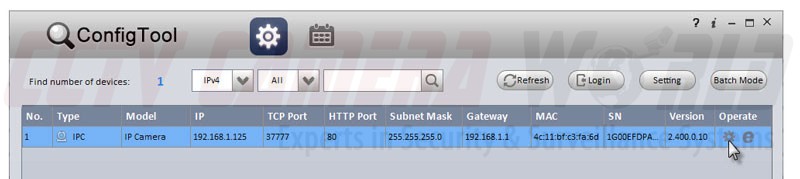
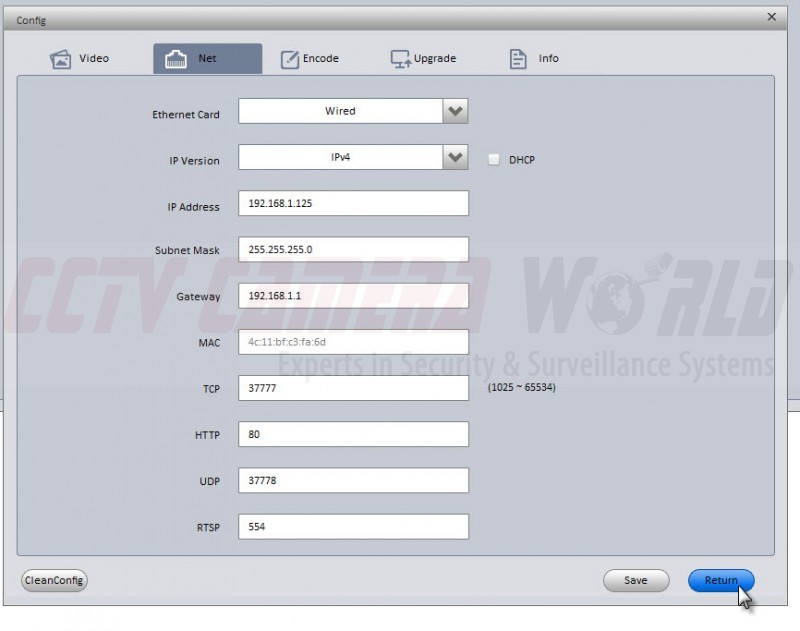
b) Click on the NET tab to access the network configuration page where yous can modify the ip accost, subnet mask, and gateway. We are going to leave our camera on the IP address 192.168.one.125, but detect that we have unchecked the box next to DHCP. By disabling DHCP nosotros can ensure that the ip accost of the camera will stay static and not modify when there is a network reboot. Subsequently you accept selected the network credentials to gear up, be certain to disable DHCP by unchecking the box next to it.
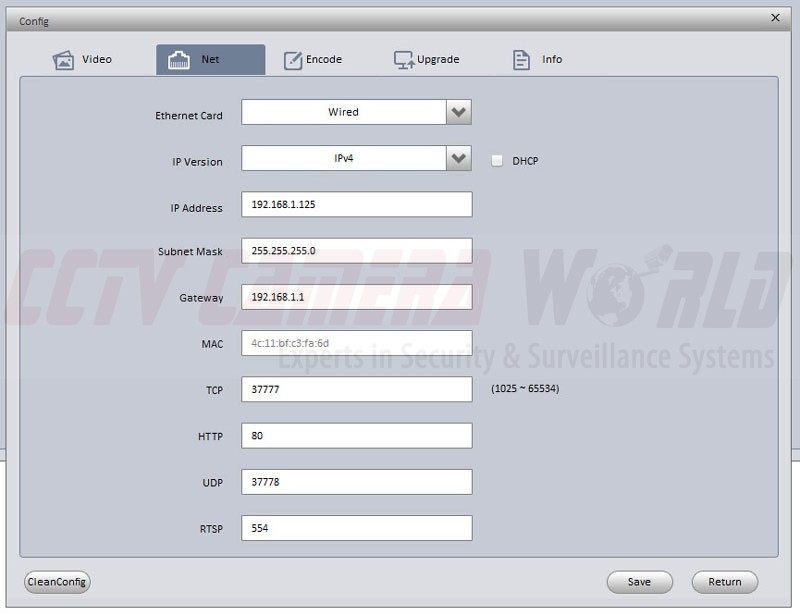
If you plan to only change the ip accost, please brand sure your Subnet Mask and Gateway are the same equally for your figurer in Step three J.
Also, note the following ports and their significance:
- TCP 37777 - the TCP port is what carries the video/information streams for our cameras, DVRs, and NVRs. The default is 37777 on all of our devices, and is required to be port forwarded if you want to view the camera or recorder remotely away from home
- HTTP eighty - the HTTP port is required for access using a web browser. It allows the ip camera and DVR/NVR to serve a login webpage where you tin enter your user credentials and and then view video using a spider web browser. The default port number is always 80 since it is reserved for the HTTP protocol. The HTTP port is not required for port forwarding if you program to use just our iPhone, iPad, Android Apps, and PC or Mac customer software, and not the web browser.
- UDP 37778 - is non a required port for port forwarding
- RTSP 554 - port 554 is reserved for the RTSP protocol on all devices. It allows a video stream to be served to any application that can accept video over RTSP.
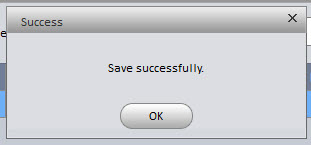
Click Save when you are washed.
c) You may exist prompted with a few Attending Prompts, simply press OK on these:
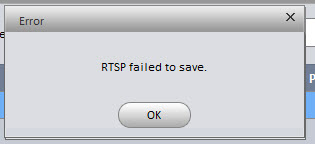 Ignore and press OK
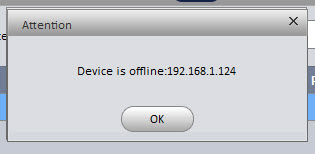 Ignore this alert and press OK
 Simple press OK on this prompt
d) Y'all're all done, the ip accost is inverse. Simply click return to go back to the device list.
 Press Return to go back to Config Tool device list
eastward) Return to Stride 4 and access your camera using the web browser by launching it from the Config Tool, or typing the IP address in your web browser.
If you are withal unable to view your camera on your network, make sure of the post-obit:
- The camera is receiving power - cheque whether the infrared LED's on the camera turn on when you lot plow of the lights. You should come across the IR LEDs glow carmine in consummate darkness.
- There is network traffic from the camera - on your switch there should exist Activity LEDs which betoken whether a device is connected. Unplug and re-plug the network cable from the switch to check whether the network action LED is active for the port the camera is connected to.
- It is always a good idea to bench exam IP cameras, DVRs and NVRs with a known network cable y'all know is good and has been tested with some other device or network cablevision continuity tester.
We also offer networking support for users who require assist with their network. You lot tin find more data about it hither.
Source: https://www.cctvcameraworld.com/how-to-view-ip-cameras-from-web/
Posted by: carterawye2001.blogspot.com
0 Response to "How To Connect Camera To Website"
Post a Comment